
Choose an environment suited to the model
Follow ComfyUI's official installation instructions to get a version suited to your operating system and GPU. Check the model's recommended requirements and available storage. The official Wan2.2 5B example says it is expected to fit within 8 GB of VRAM when using native offloading.
This requirement applies to the 5B example. It may not apply to other models, longer videos, or higher resolutions.
Open an official video template
Choose a video workflow from Templates. Check the required models and download the specified files. Desktop may be able to download models automatically.
If you cannot find a new template, check your ComfyUI version and the official guide.
Match the model types and file locations
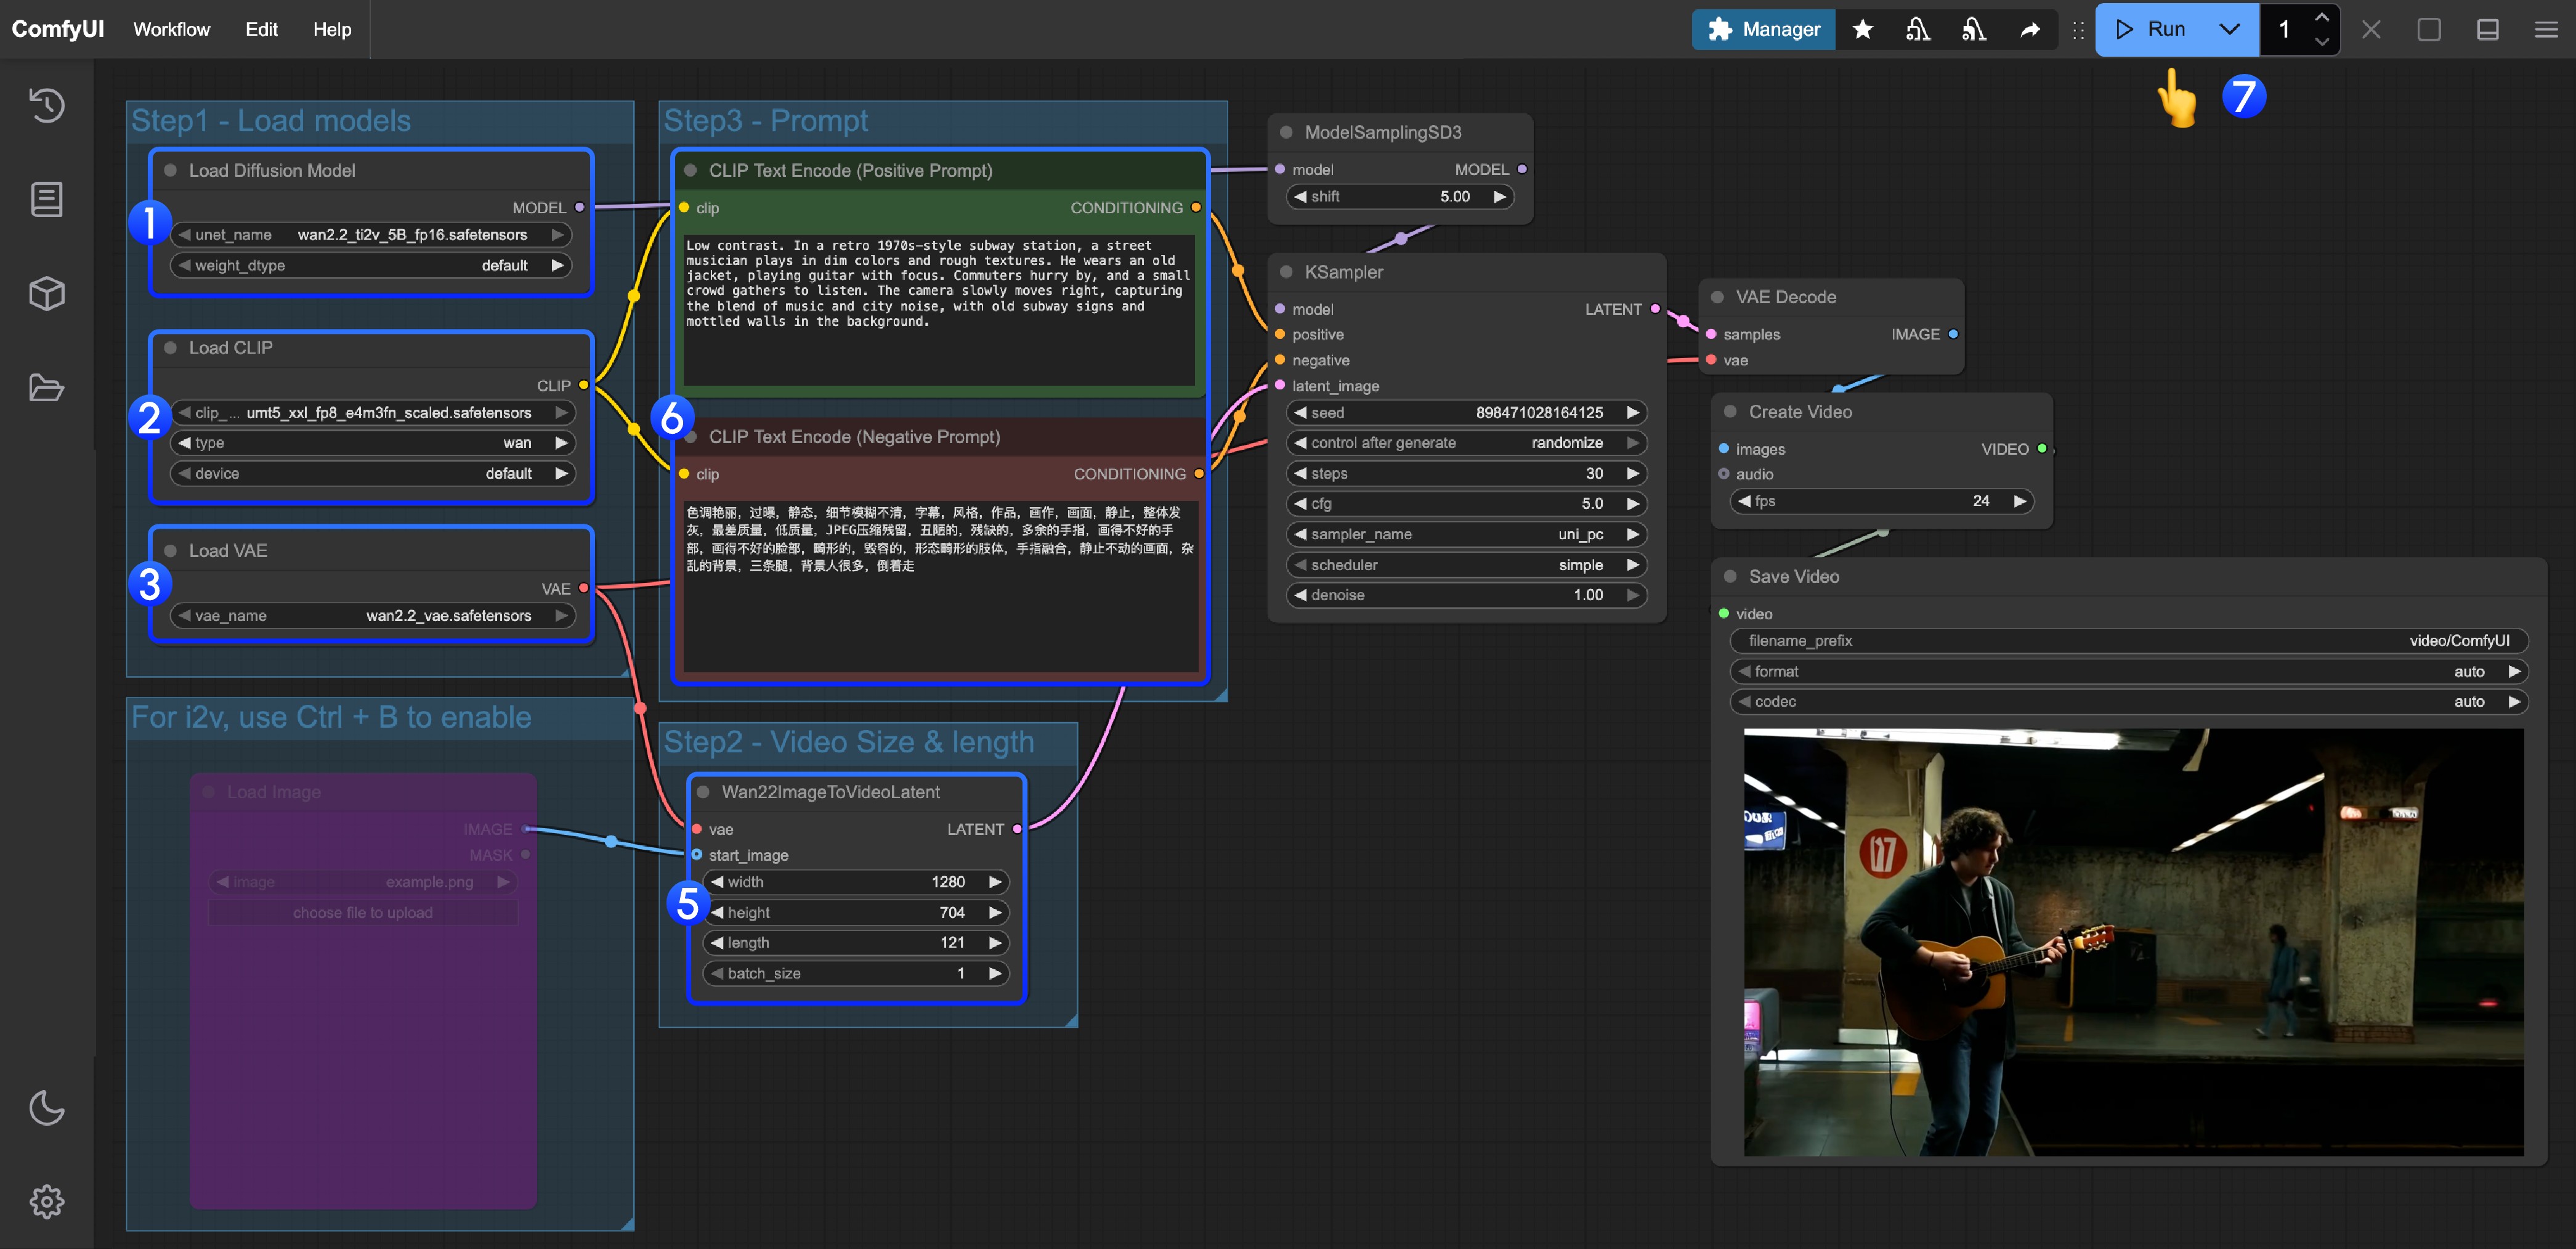
Check the setup that places diffusion models in models/diffusion_models, text encoders in models/text_encoders, and VAEs in models/vae. In each Loader, select the combination specified by the template.
Files with the same extension can have different roles. Check the file names and compatible models.
Read the flow of nodes
Follow model loading, prompts, video size and length, sampling, decoding, and video output. Generate a short sample first and check the output before changing settings.
When a node's length parameter is a frame count, do not enter seconds directly. For example, 121 frames exported at 24 fps is about five seconds.
Compare one setting at a time
Record the prompt, seed, resolution, frame count, steps, and other settings, then change only one at a time. To compare the same subject's movement, keep the reference image and other conditions fixed.
Fixing the seed helps comparisons, but changing the model or environment may still change the result.
Save a workflow that worked
Keep an editable workflow in the regular saved JSON, and record model file names, the ComfyUI version, additional nodes, and accepted outputs. Add additional nodes as they become necessary.
To run it again on another PC, you need the matching models and nodes as well as the JSON.
Understand the API format for automation
When moving to automated execution, save API JSON using File → Export Workflow (API). Its structure differs from the regular saved JSON. On your own server, add it to the queue with POST /prompt and use prompt_id to check history and progress.
First build a workflow that runs manually, then move on to changing input values through the API.